Software Description
SysExporter utility allows you to grab the data stored in standard list-views, tree-views, list boxes, combo boxes, text-boxes, and WebBrowser/HTML controls from almost any application running on your system, and export it to text, HTML or XML file.
Here’s some examples for data that you can export with SysExporter:
- The files list inside archive file (.zip, .rar, and so on) as displayed by WinZip or 7-Zip File Manager.
- The files list inside a folder.
- The event log of Windows.
- The list of emails and contacts in Outlook Express.
- The Registry values displayed in the right pane of the Registry Editor.
- The data displayed by SysInternals utilities (Registry Monitor, File Monitor, Process Explorer, and others.)
- The text inside a standard message-box of Windows.
- The HTML inside any instance of Internet Explorer.
System Requirements
SysExporter Works perfectly on Windows NT, Windows 2000, Windows XP, Windows Server 2003, Windows Server 2008, Windows Vista, Windows 7, Windows 8, and Windows 10.
On Windows 9x and Windows ME, SysExporter can only export data from combo boxes and list boxes controls, but not from list-view and tree-view controls.
Known Limitations
SysExporter can export data from most combo boxes, list boxes, tree-view, and list-view controls, but not from all of them. There are some applications that use these controls to display data, but the data itself is not actually stored in the control, but in another location in the computer’s memory. In such cases, SysExporter won’t be able to export the data.
Using SysExporter
This utility is a standalone executable, so it doesn’t require any installation process or additional DLLs. Just run the executable (sysexp.exe) and start using it. There is only one exception: If you want to run this utility on Windows NT, you should download the ‘psapi.dll’, and copy it into the system32 folder.
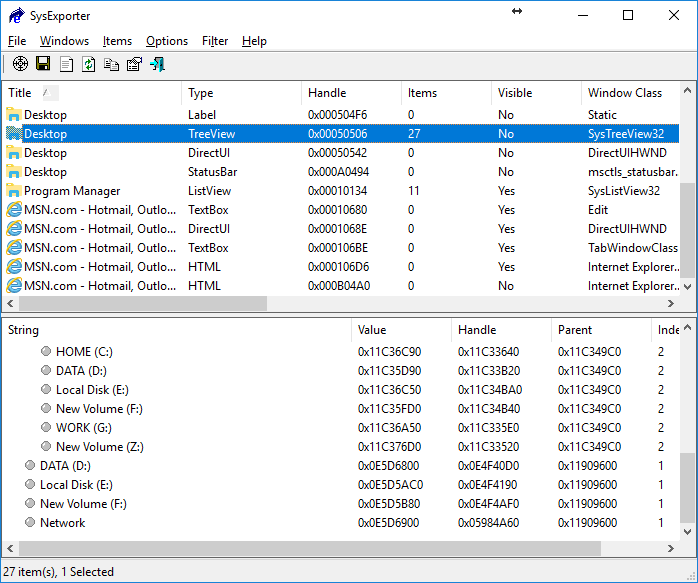
The main window of SysExporter contains 2 panes:
- The upper pane displays the list of current opened windows that are available for export.
- When you select a single window in the upper pane, the lower pane displays all data that you can export from the selected window. For example: If you select the ‘My computer’ window in the upper pane, the lower pane will display the list of all your disks, and they are displayed in the original ‘My Computer’ window.
You can easily select one or more items from the lower pane, and then export them to text, HTML or XML files. You can also copy the exported data to the clipboard in tab-delimited format (Ctrl+C), and then paste it directly to Excel or any other application that supports this format. Before exporting the data, you can change the order of columns that will be appeared in the saved files by using the ‘Choose Columns’ option.
Practical Example
Let’s say that you want to export the list of all files in your C:\Windows folder to Excel:
- First, open the ‘C:\Windows’ folder (or any other folder that you want to export).
- In the top pane of SysExporter, find the window of ‘C:\Windows’ folder and select it. If you cannot find this window, try to refresh the list by pressing F5 key.
- After selecting the desired window in the top pane, the files list of this window will be loaded to the lower pane.
- Select the files in the lower pane that you want to export. (Press Ctrl+A in order to select all files)
- Press Ctrl+C in order to copy the selected items to the clipbaord. (The exported items are copied in tab-delimited format)
- In Excel, go the position that you want to put the exported data, and then press Ctrl+V to paste the exported data into your Excel worksheet.
Locating the right window with Drag & Drop
Starting from version 1.50, you can easily locate the desired window by using the targeting button. In order to do that, simply press the targeting button of the toolbar, and then drag it to the window that you wish to export the data. If the selected window is detected by SysExporter, it’ll automatically be displayed in SysExporter.


